For
a few months now I have been planning to make a bag to take on holiday with me
that can be carried on my back with no other handbags or bags. I didn't really
know what I wanted, but on a recent trip to the NEC in Birmingham sewing for
pleasure expo I stumbled upon some burlap/hessian and straight away knew I
wanted to make an old satchel. This is the pic of what it turned out to be, only took 20 hours of sewing!
I own a singer 306k and 201K, I decided to use the 201 as i could use a leather needle for it that I cant get any more for the 306.


I decided on trying to make it out of one huge section as possible as I didn't want it to fray or loose its shape.

I then when about drafting the pattern, it used about 2 metres of pattern paper.

This was all the materials I had brought over the past few weeks, I think it totalled to around £100.
2 metres boning (sew-able, I love this stuff)
X2 22inch zips
2metres of hessian/burlap
1.5metres lining
A4 clear plasitic
2 metres webbing
2 metres wadding
2 metres of bias binding
4 ladder locks
6 metal eet
2 clasps
50cm velcro
X4 30m metres thick top stick thread
2 metres medium interfacing
50 cm Iron on waterproofing stuff?
50cm bag stiffner
5 A4 sheets of 7 count plastic

I ironed on the interfacing onto the Burlap in one whole piece.
Pinned the pattern.
Cut the pattern, when cutting I used a water spray gun as I didn't want the burlap dust getting everywhere.

This was the flap of the satchel that I sewed 2 strips of polyester rigford boning into and then measured the bag stiffener and double sided tape onto the bag to help keep in place after sewing in the lining.

As you can see I left gaps where the boning was in relation to the bag stiffener as I wanted it to fold nicely.

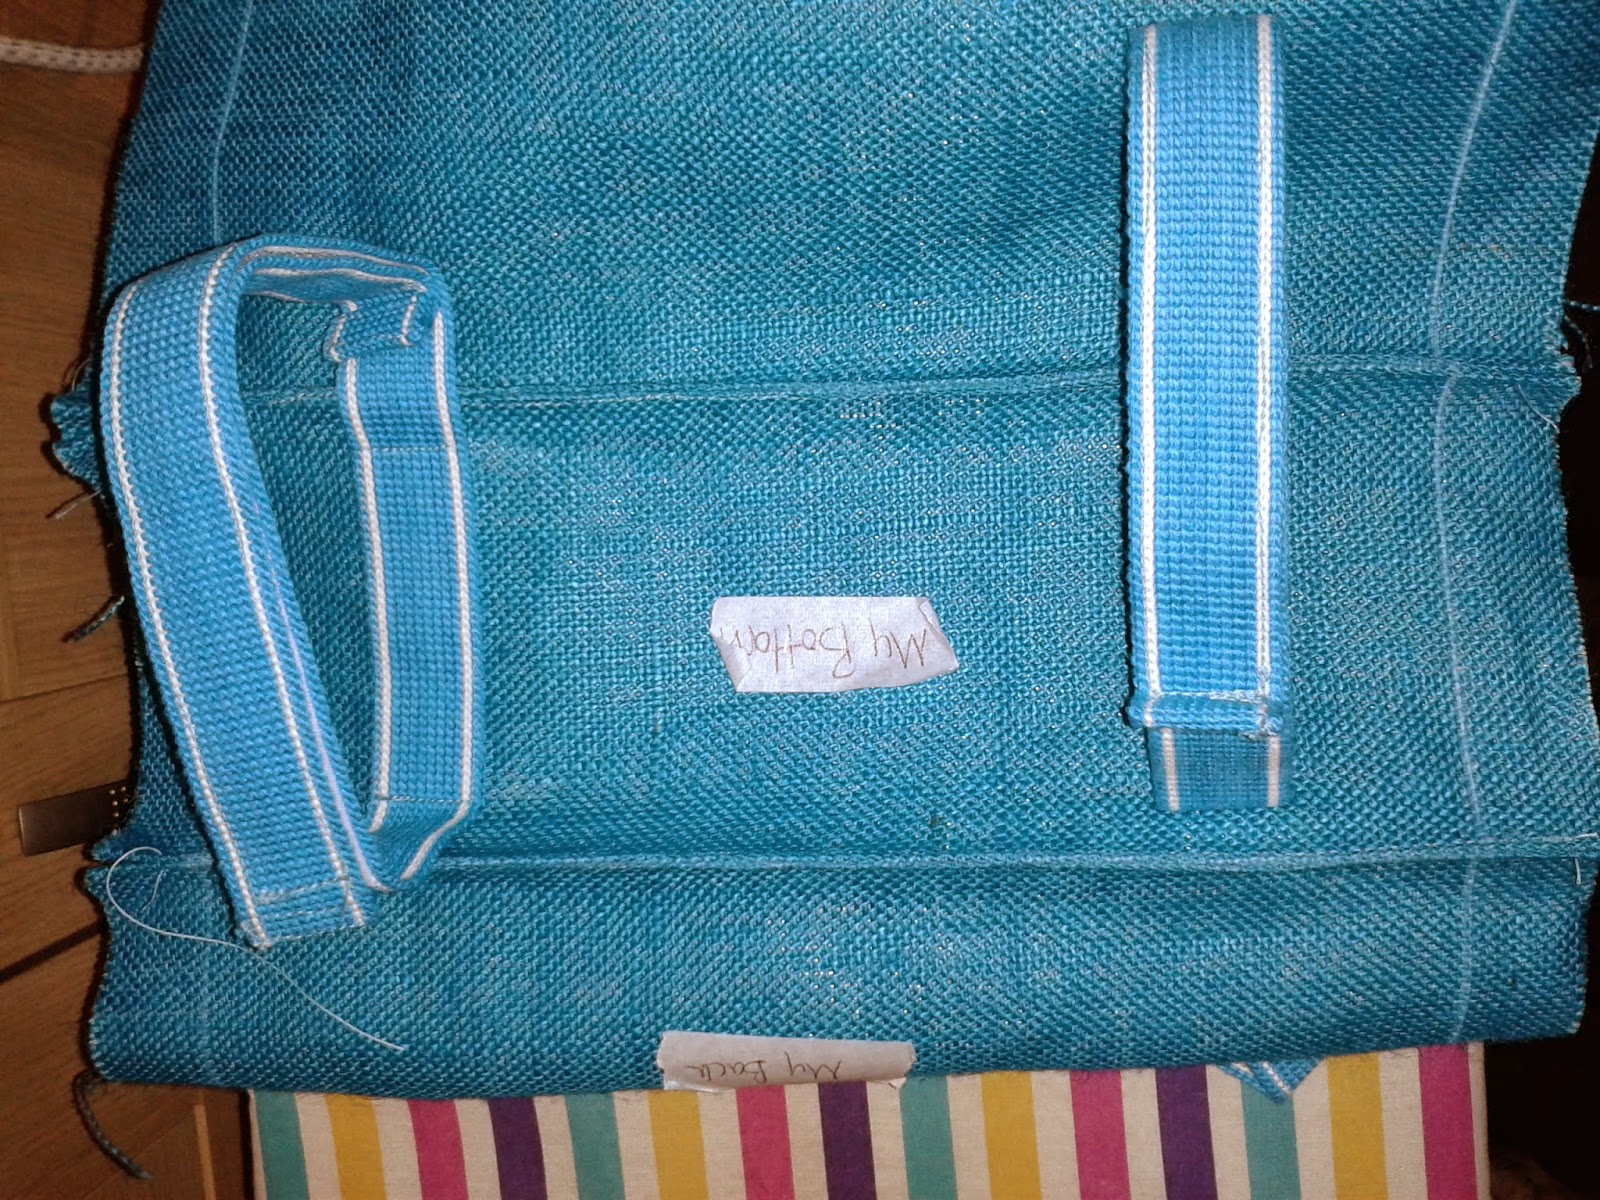
I then attached and made loops for the buckles.

I then cut the lining, pinned, I had to leave some room at the top so that it could be turned inside out, right way round, then did 2 lines of top stitch.

Not that bad. One annoying thing was that as the top stitch thread was thicker it took ages to find the correct tension, so the ticker the thread the higher the tension is something I learnt the hard way.

Next was the straps. I had right sides of lining fabric and hessain together and stitched 8oz wadding onto it, leaving the top and bottom free to be turned the right way round.

I had to use a chop stick to turn it the right way round, had to be careful though as I dint want to stretch the hessian.

I then decided to thread the webbing through the whole strap, in part because I didn't want it to loose its shape or strength when being used, so I used the chop stick again to help.

I then took the rest of the wading out of the end and stitched it up.

I attached the webbing onto the flap and stitched the webbing only, not the bulk of the strap.
At the same time I also attached the bottom straps to the back of the bag.

I then went about using making tape as a label marking out all the different parts of my bag, I also chalk lined it all so I knew what when where as it was all done in one huge piece.


I cut 2 pieces, the main pocket and the side extender.
I ironed on waterproof matt stuff to the front and I also cut some clear flexible plastic for the inside and pinned on.
I then had to pin and sew the extender and then top stitch along the top.
As you maybe able to see I also ironed it so that when not in use it folder closer to the bag.

I then pined and stitched the pocket on, this also hid the bottom attachment of the straps.

On the very bottom of my bag I wanted to make some velcro straps that could hold a blanket for the dogs to lye on, this also double as a good way to carry any extra stuff I may purchase while out and about on holiday.

then stitched on these straps making sure the the hocks of the velcro were facing away from the inside as I didn't want it to catch on the blanket I was going to make.

I also decided to attach the front webbing with buckles and strap ladders to the front.

Now to add the boning to the main part of the body of the bag. I had left my self 1 inch space to do this and ironed it first to make a 'V' shape that my boning could sit into. My boning was shorter than the height of my bag as I wanted it to be easier when I stitched it all together.
You can see the effect the boning has, although on;ly 7mm wide and using 4 layers of hessian it gives it the strength it needs to keep its shape.


This was the bit I was not looking forward to the zip. But I have to say that I tried really hard and I am really pleased with how it turned out. My only issue now that I have made it is that the pattern needs to be turned 90 degrees.

I had to stitch the main bod of the bag together making sure that all sides had boning in it.
I then went about making the lining of the bag, no zips, pretty easy.

Again another bit I was dreading, making sure that when I stitch this in it stays straight, I took the precaution of ironing it over to make life easy, the seam should loo the same as on the sides where I have inserted the boning, each seam folded over and then top stitched.

Phewww, not a bad job, I also bias binded the raw edge, thank god the 201 could do it, esp on the corners.

squareish and pretty straight.

On the bottom section of my pockets I stitched in the sides, suing the same methods as I had used on all of the other seams, with or without boning. On these seams I didn't use boning.

As I said before when I was sewing in the top zip, I was not looking forward to it, so debated with the front exposed zip on whether or not to hide it. I decided to hide it as my last ever top stitch would go above the zip and could look messy, so I made this flap to cover the zip. It was basically a strip sewn inside out then turned the right way round, pinned and stitched on.

I then pinned in the zip. I was again very worried about this as I really wanted the zip to match up on the top join. Then I stitched, very hard as the corners were quite solid

Between the bottom section and top section I left a 1 inch gap, this was quite tricky to sew with the bag getting bulker. I also had to make sure that the bottom part of the bag, the part that separates the sections was in there in the seam.

I then had to zip the zip up and attempt to sew the material that splits the 2 sections to the zip. I had to leave more material than any other seam as this was going to be the last seam that joined the whole bag together.

Not a bad straight line, Now to sew these 3 edges together with the rest of the bag. But first I had to cut the 7 count plastic (slightly small er than the actual size of the bag) and I did a stitch to hold it in place.

This is the 7 count plastic.

I am dead chuffed with it. The blanket you can see matches, which I will show and tell in the next blog.


I used my lining for the underside of the straps just in case I had a strapless top on and the burlap rubbed, or the dye rubbed off onto my clothes.


